
🛠 Creating an Event
Hosting events is exactly why you're here! In just 5 minutes time, you can have your first (or second or third or 50th!) event up and running.
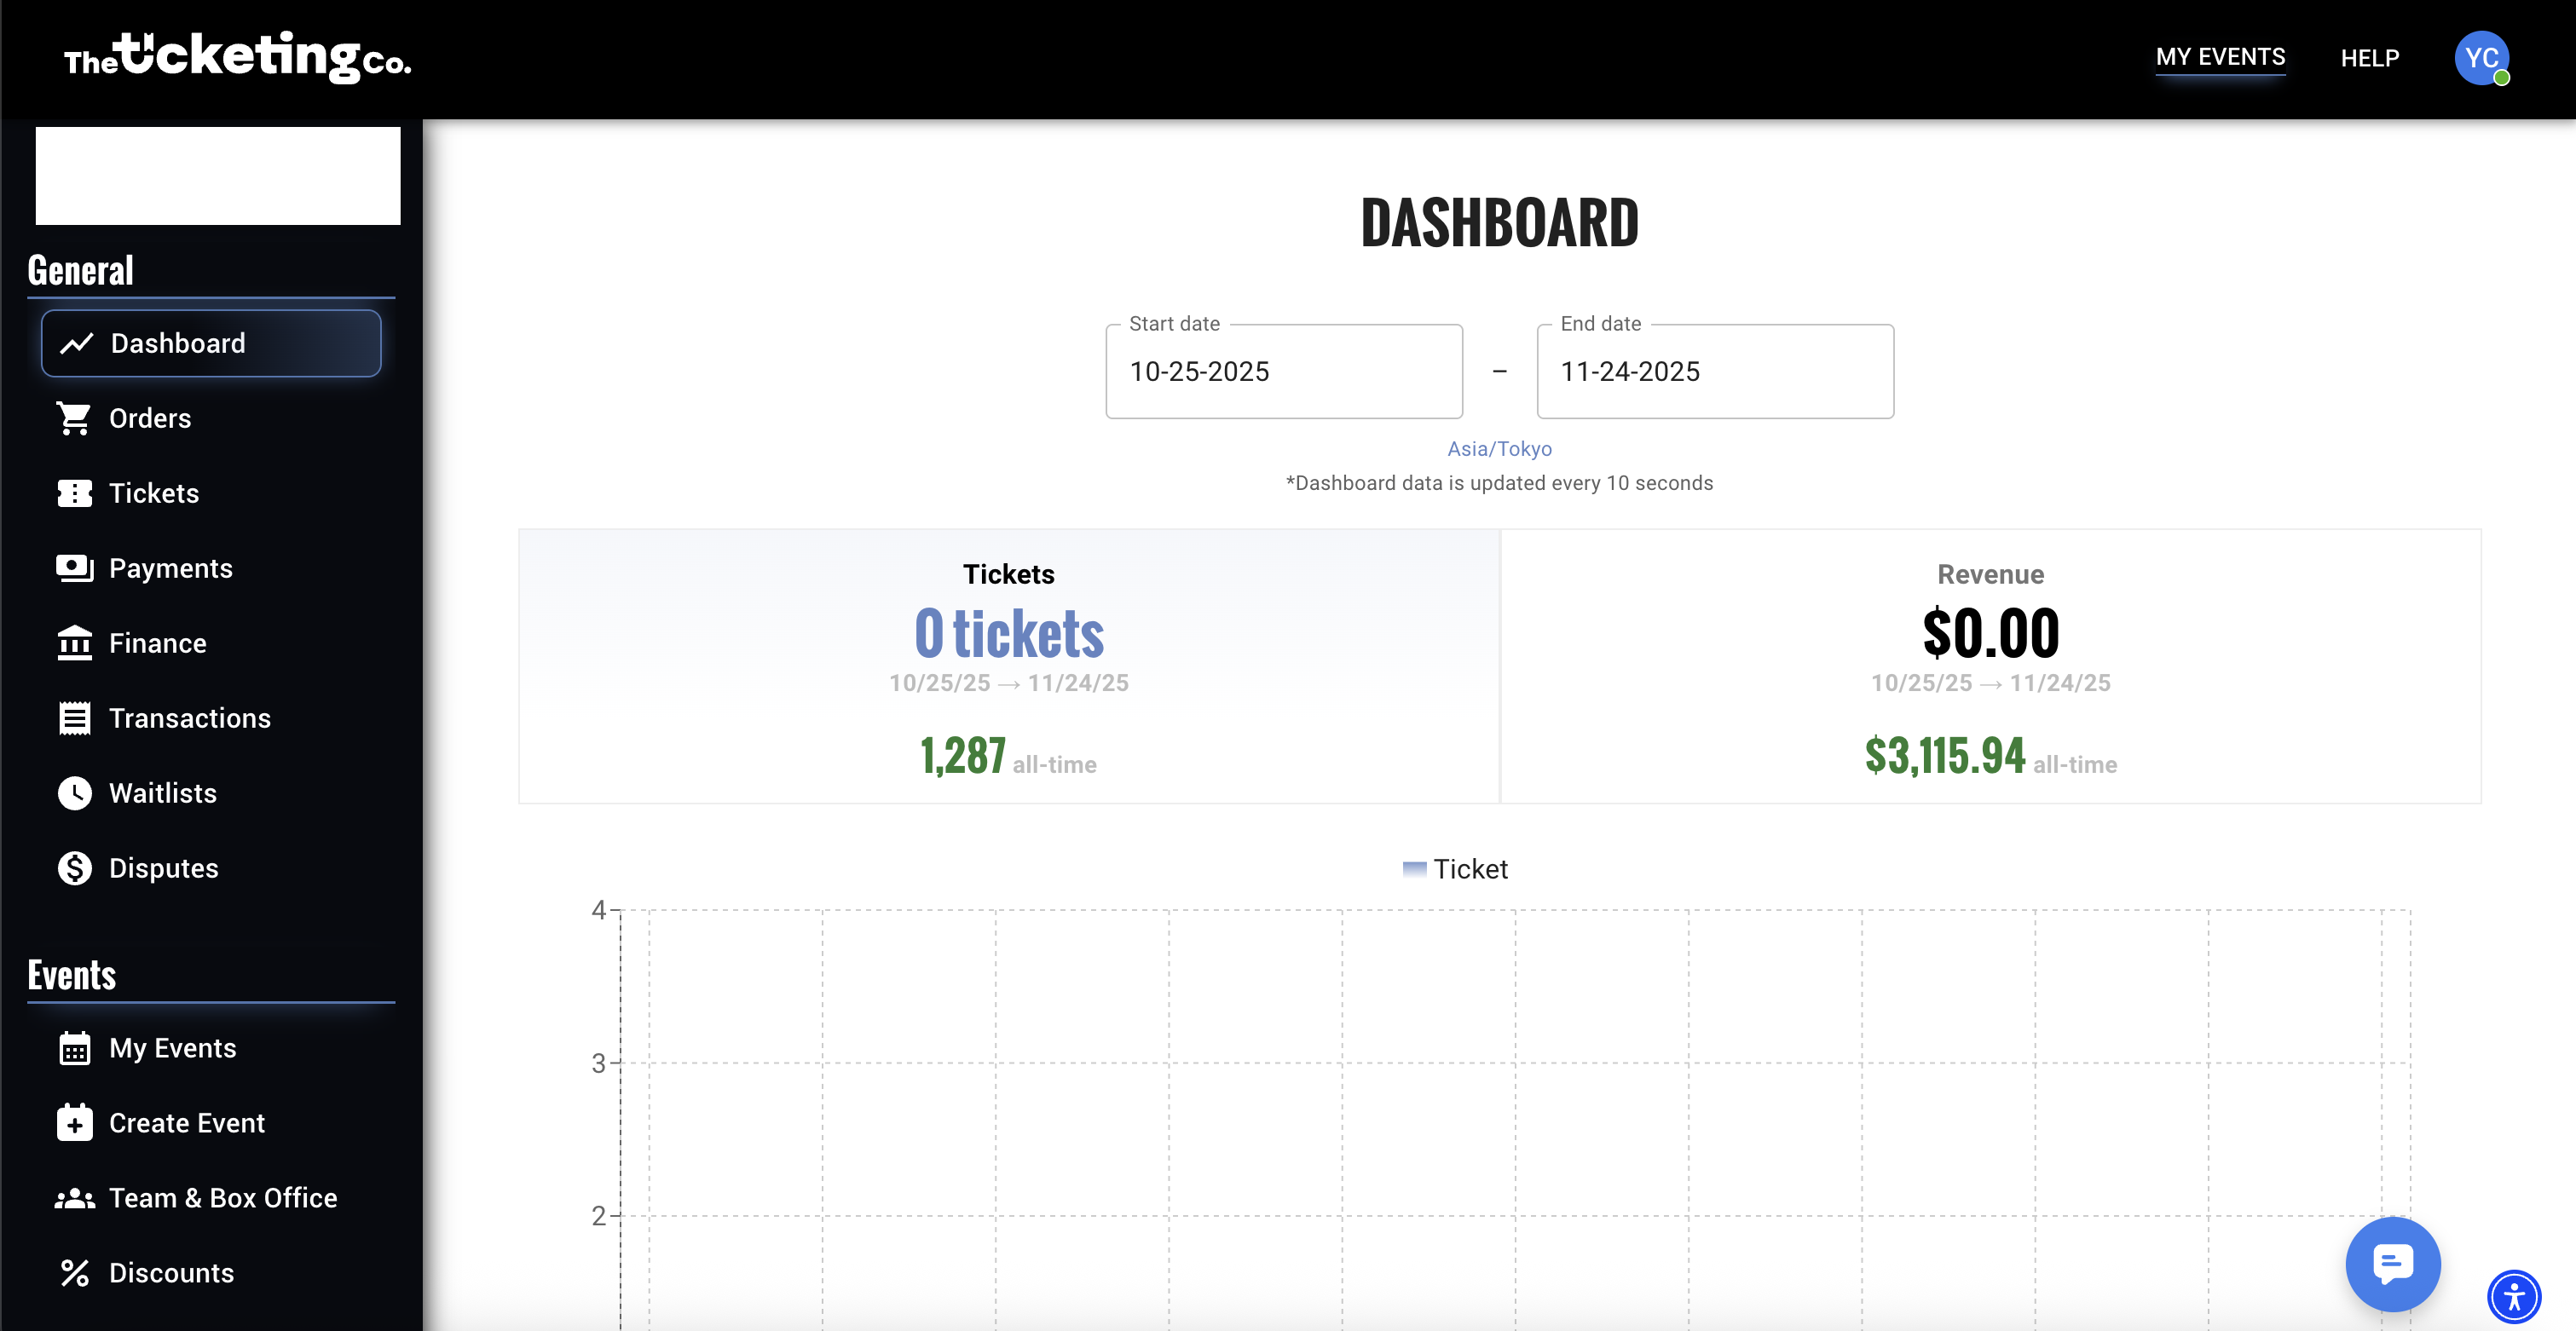
Once you've logged in, click on "Dashboard" in the top right menu, then "Create Event" under "Events" to start setting up your event.
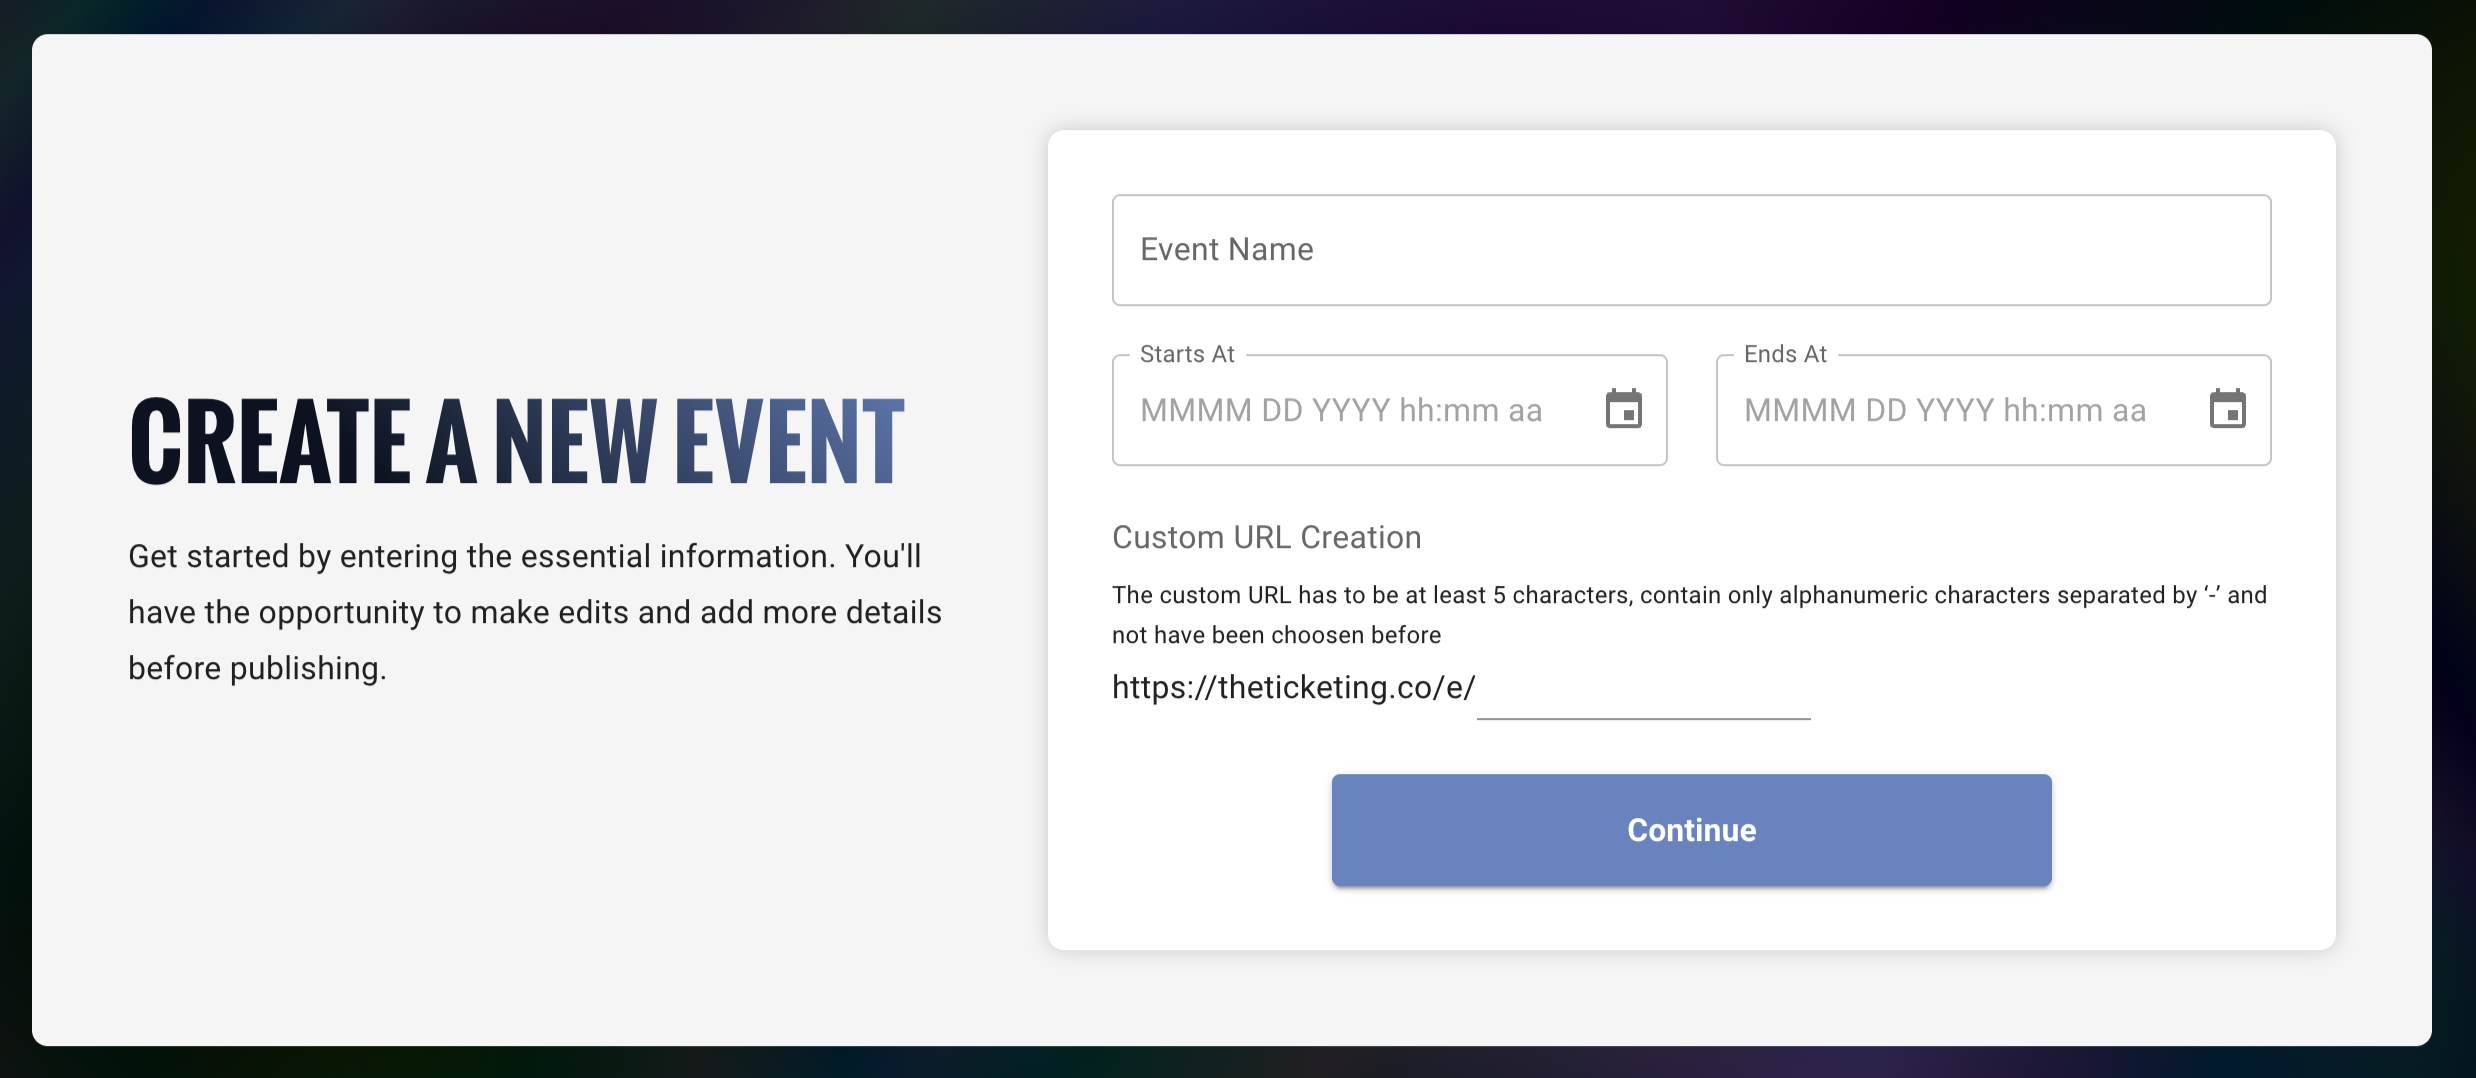
Start by entering in the basic information about your event like: the event's name, the date/time, and Custom URL.
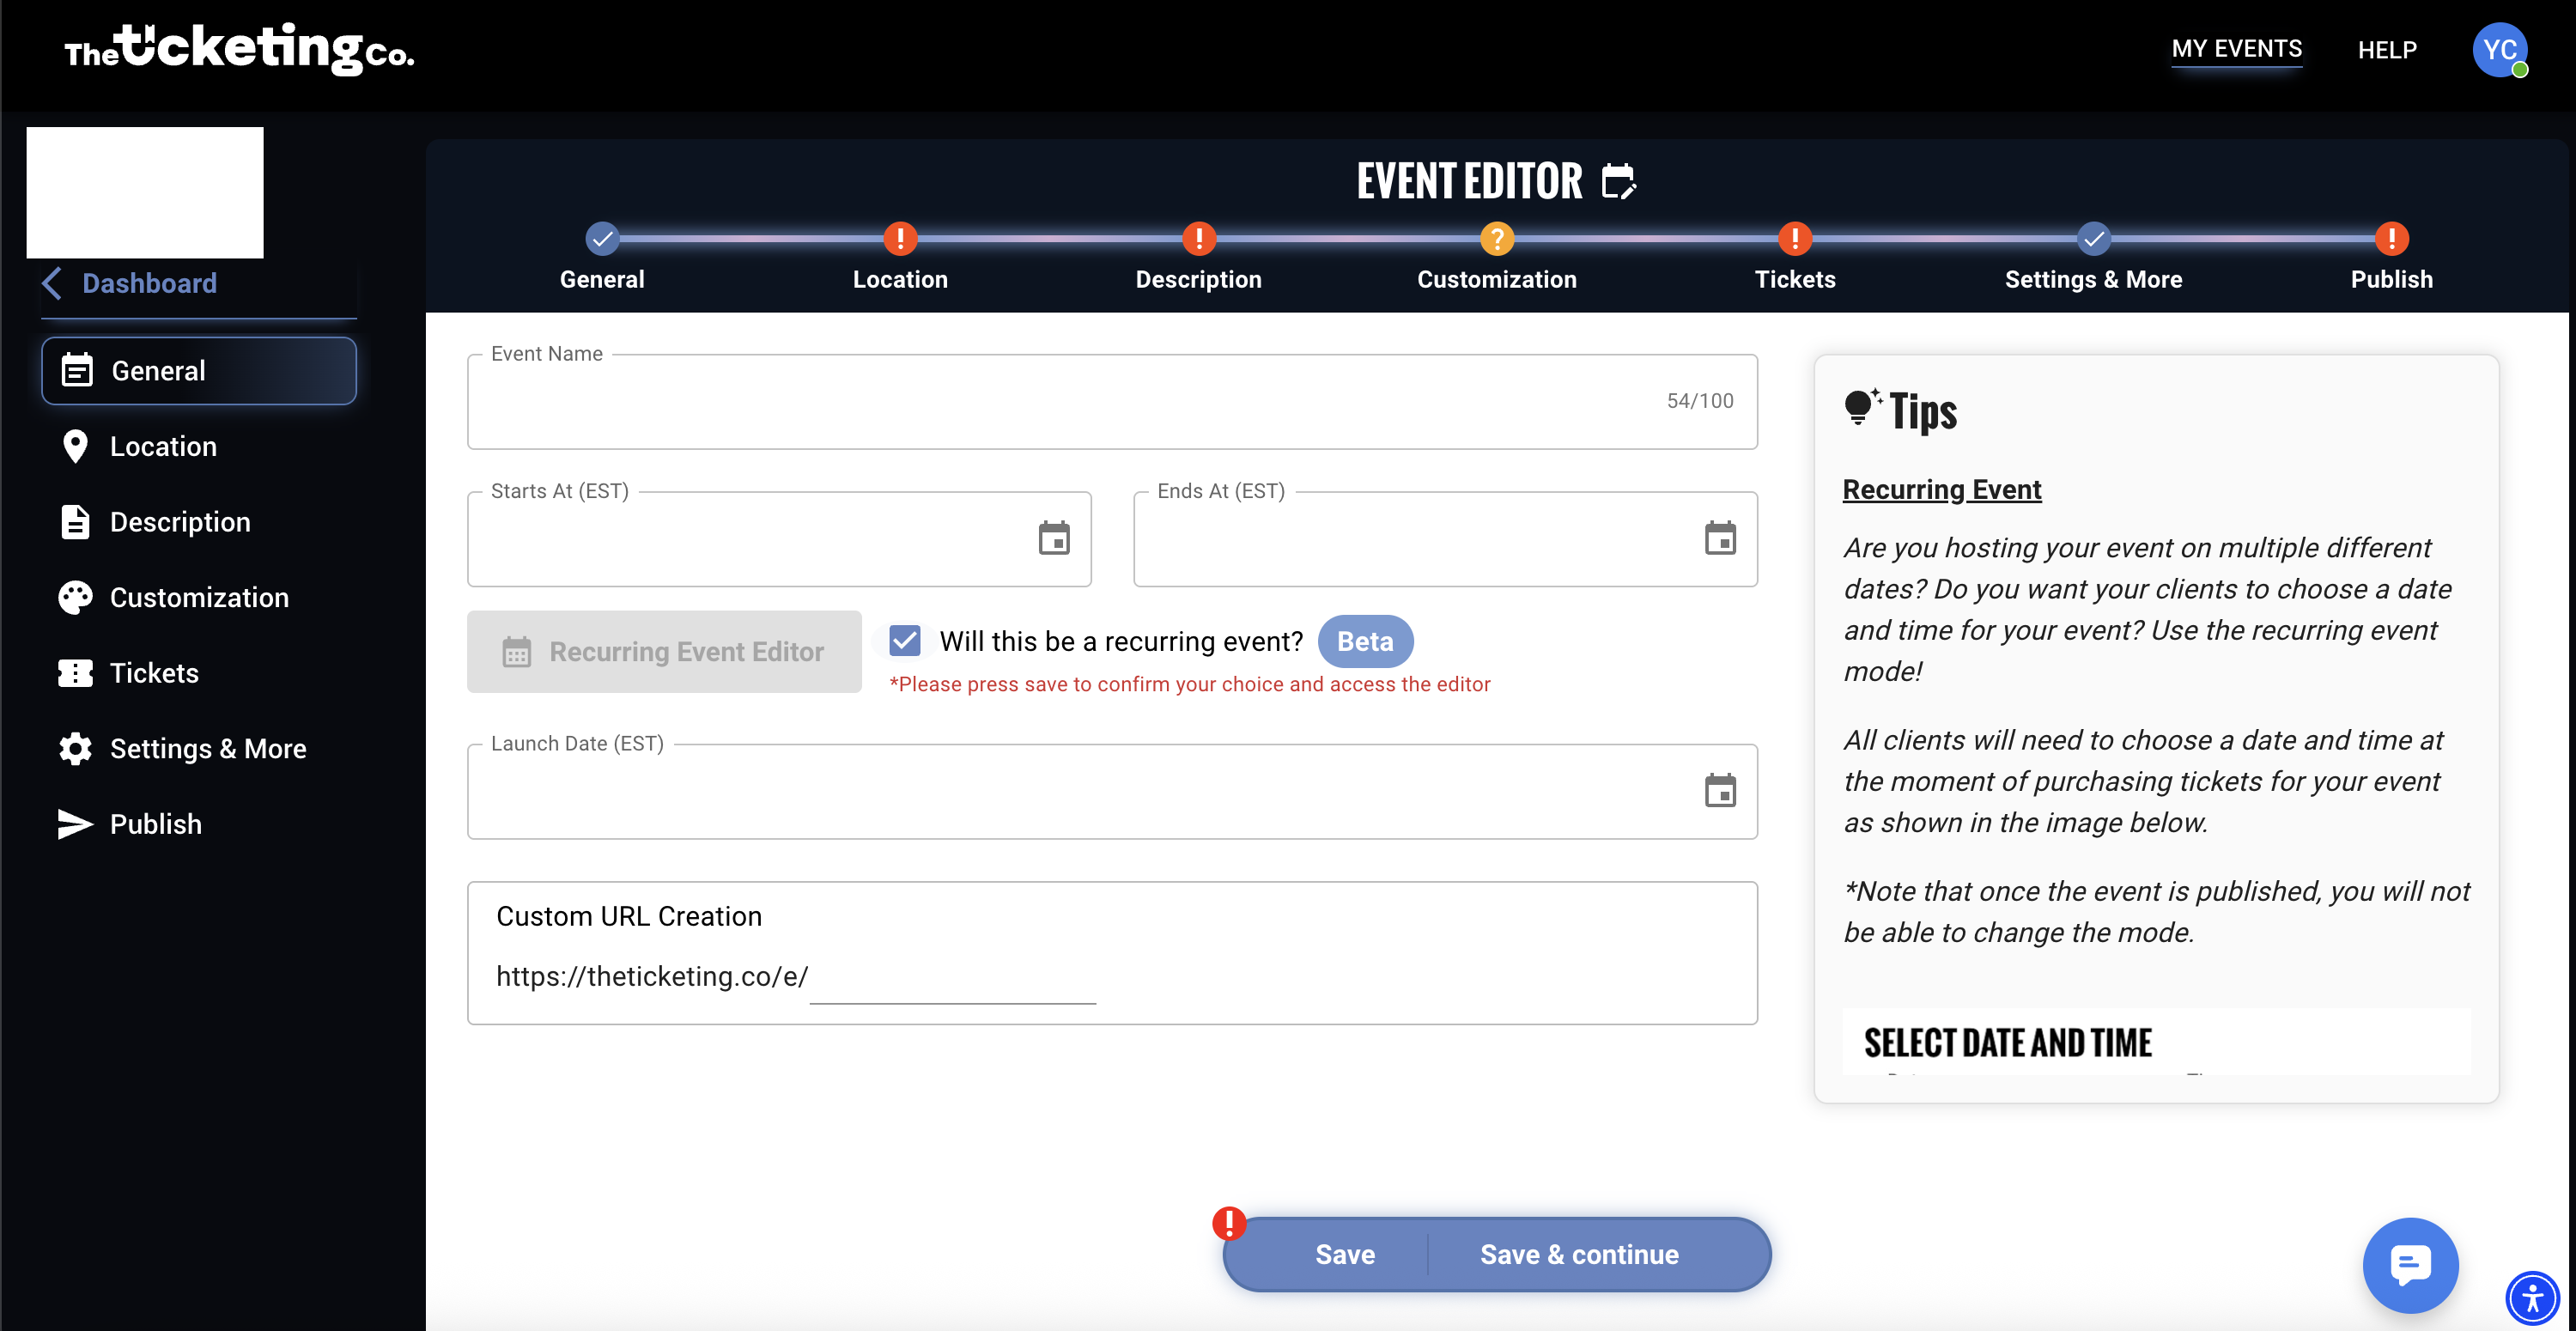
Press "Continue" to proceed to the "General" section, where you can enter the Event Name, Start/End Date and Time, Launch Date, and create a Custom URL. Is this a recurring event? You can now easily set up recurring events!
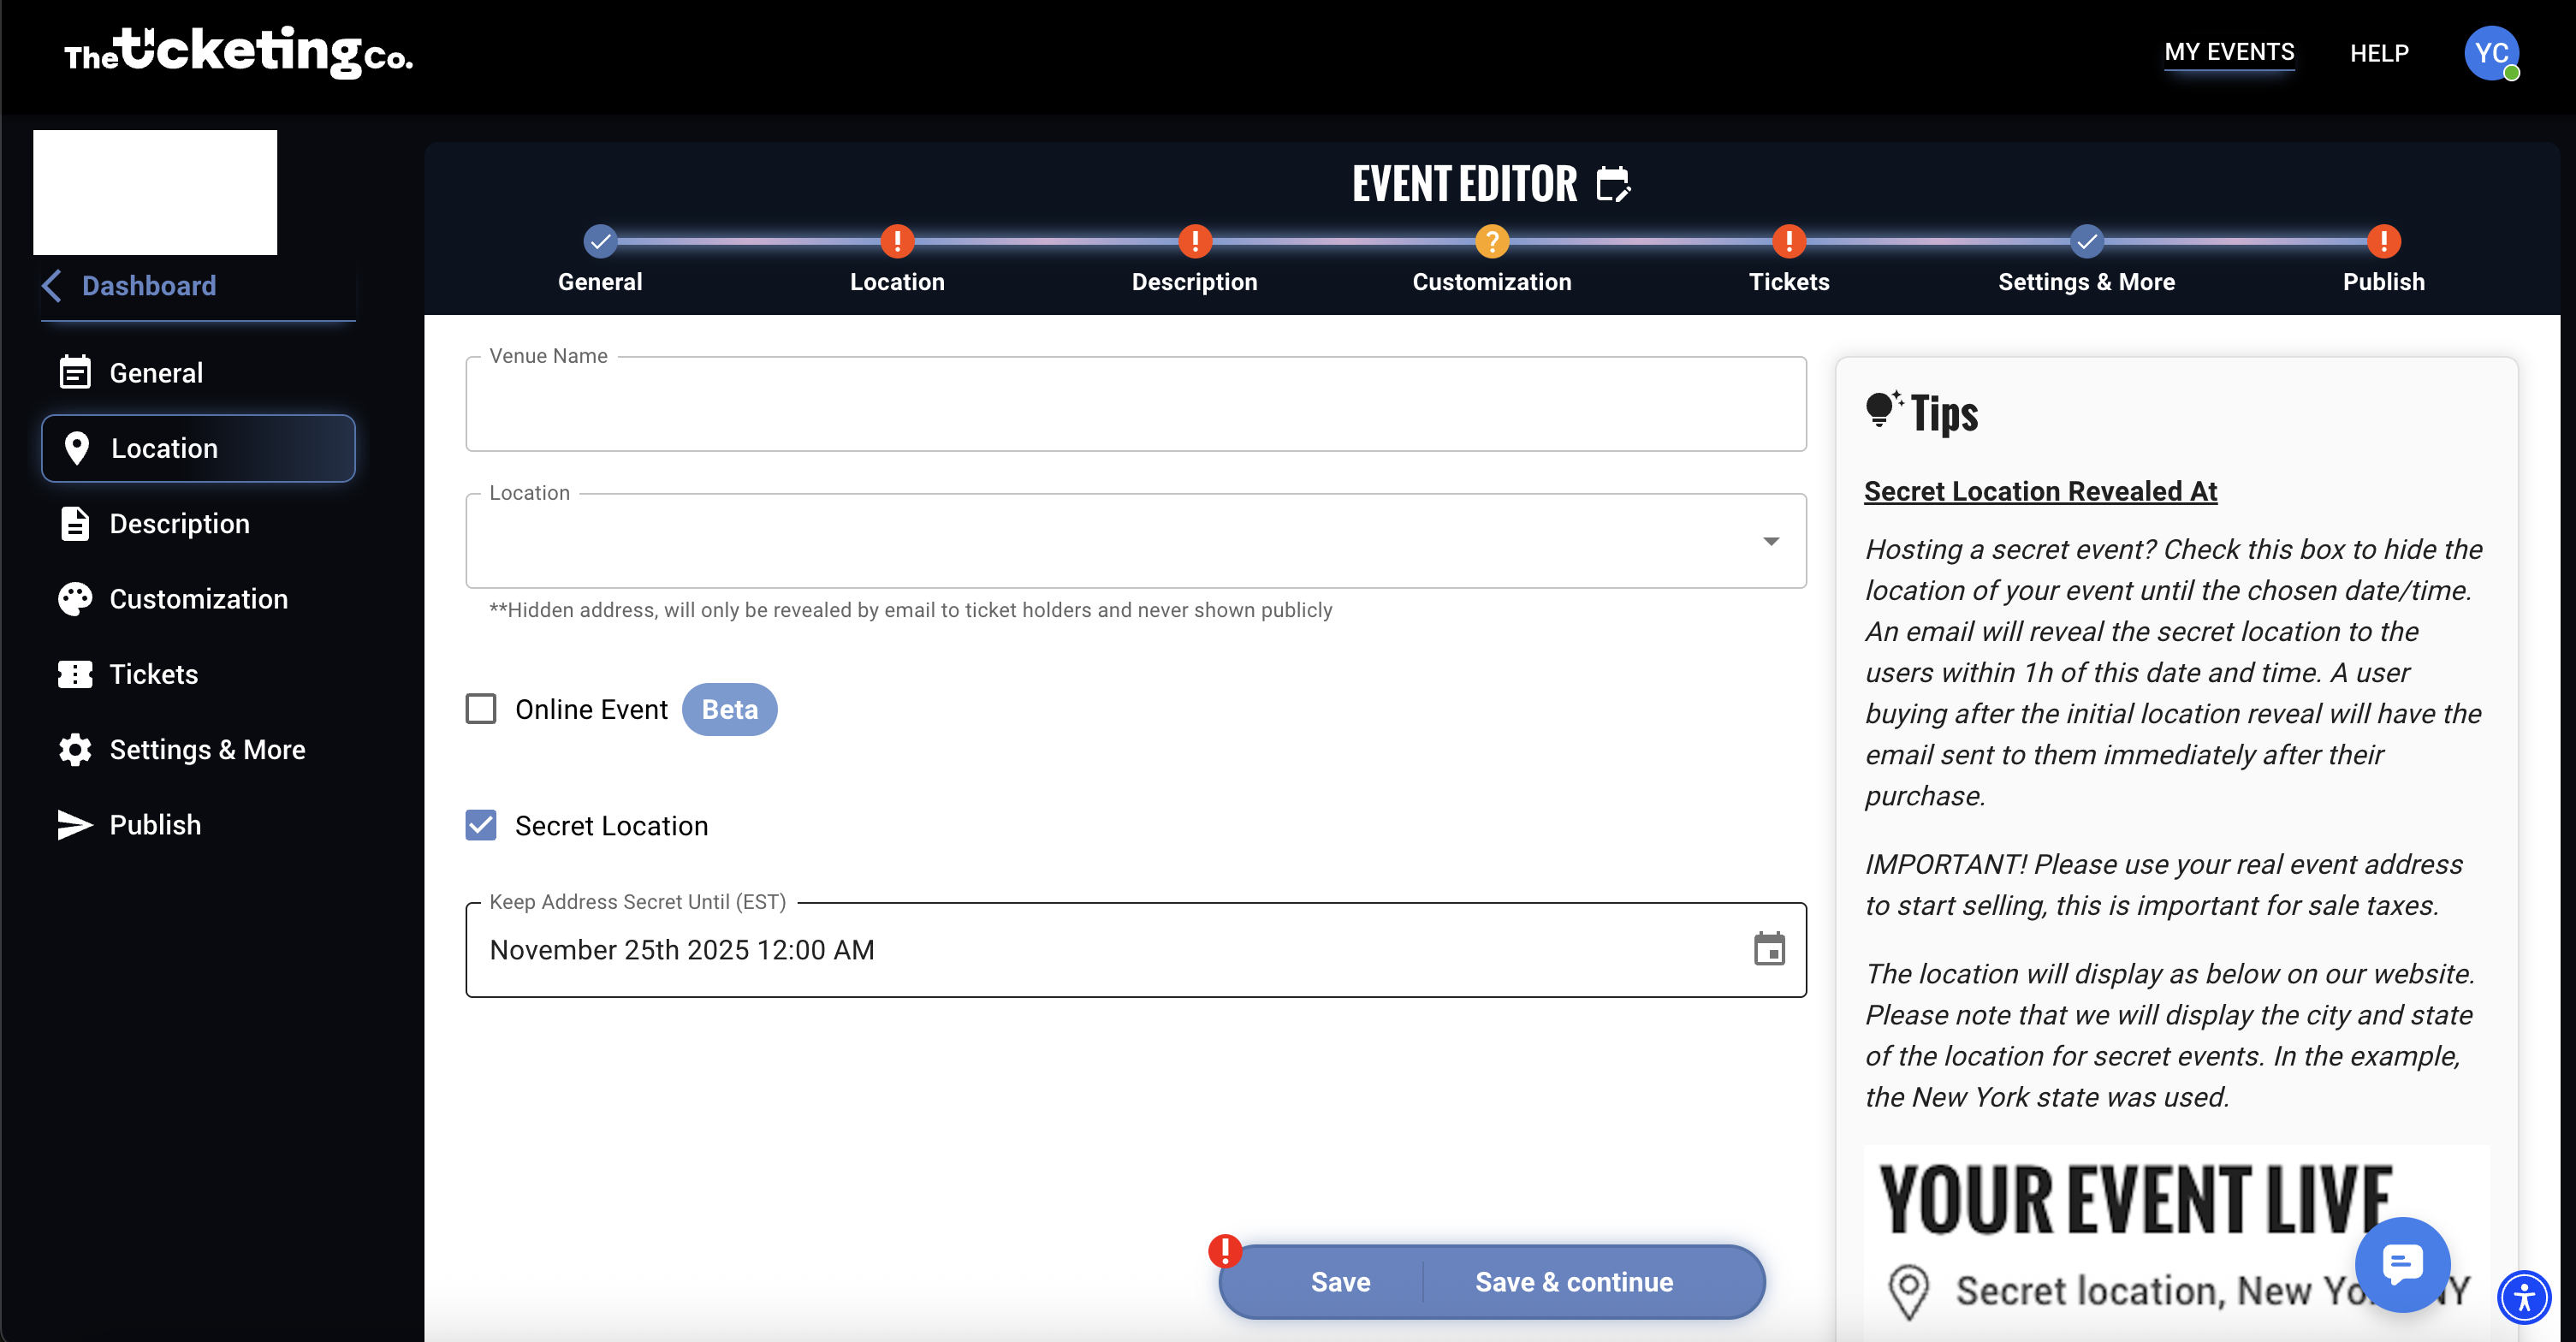
Press "Save & Continue" to proceed to the "Location" section. Here, you can enter your Venue Name and Address. If you are hosting a secret event, you can select "Secret Location" to hide the event's location until the specified date and time.
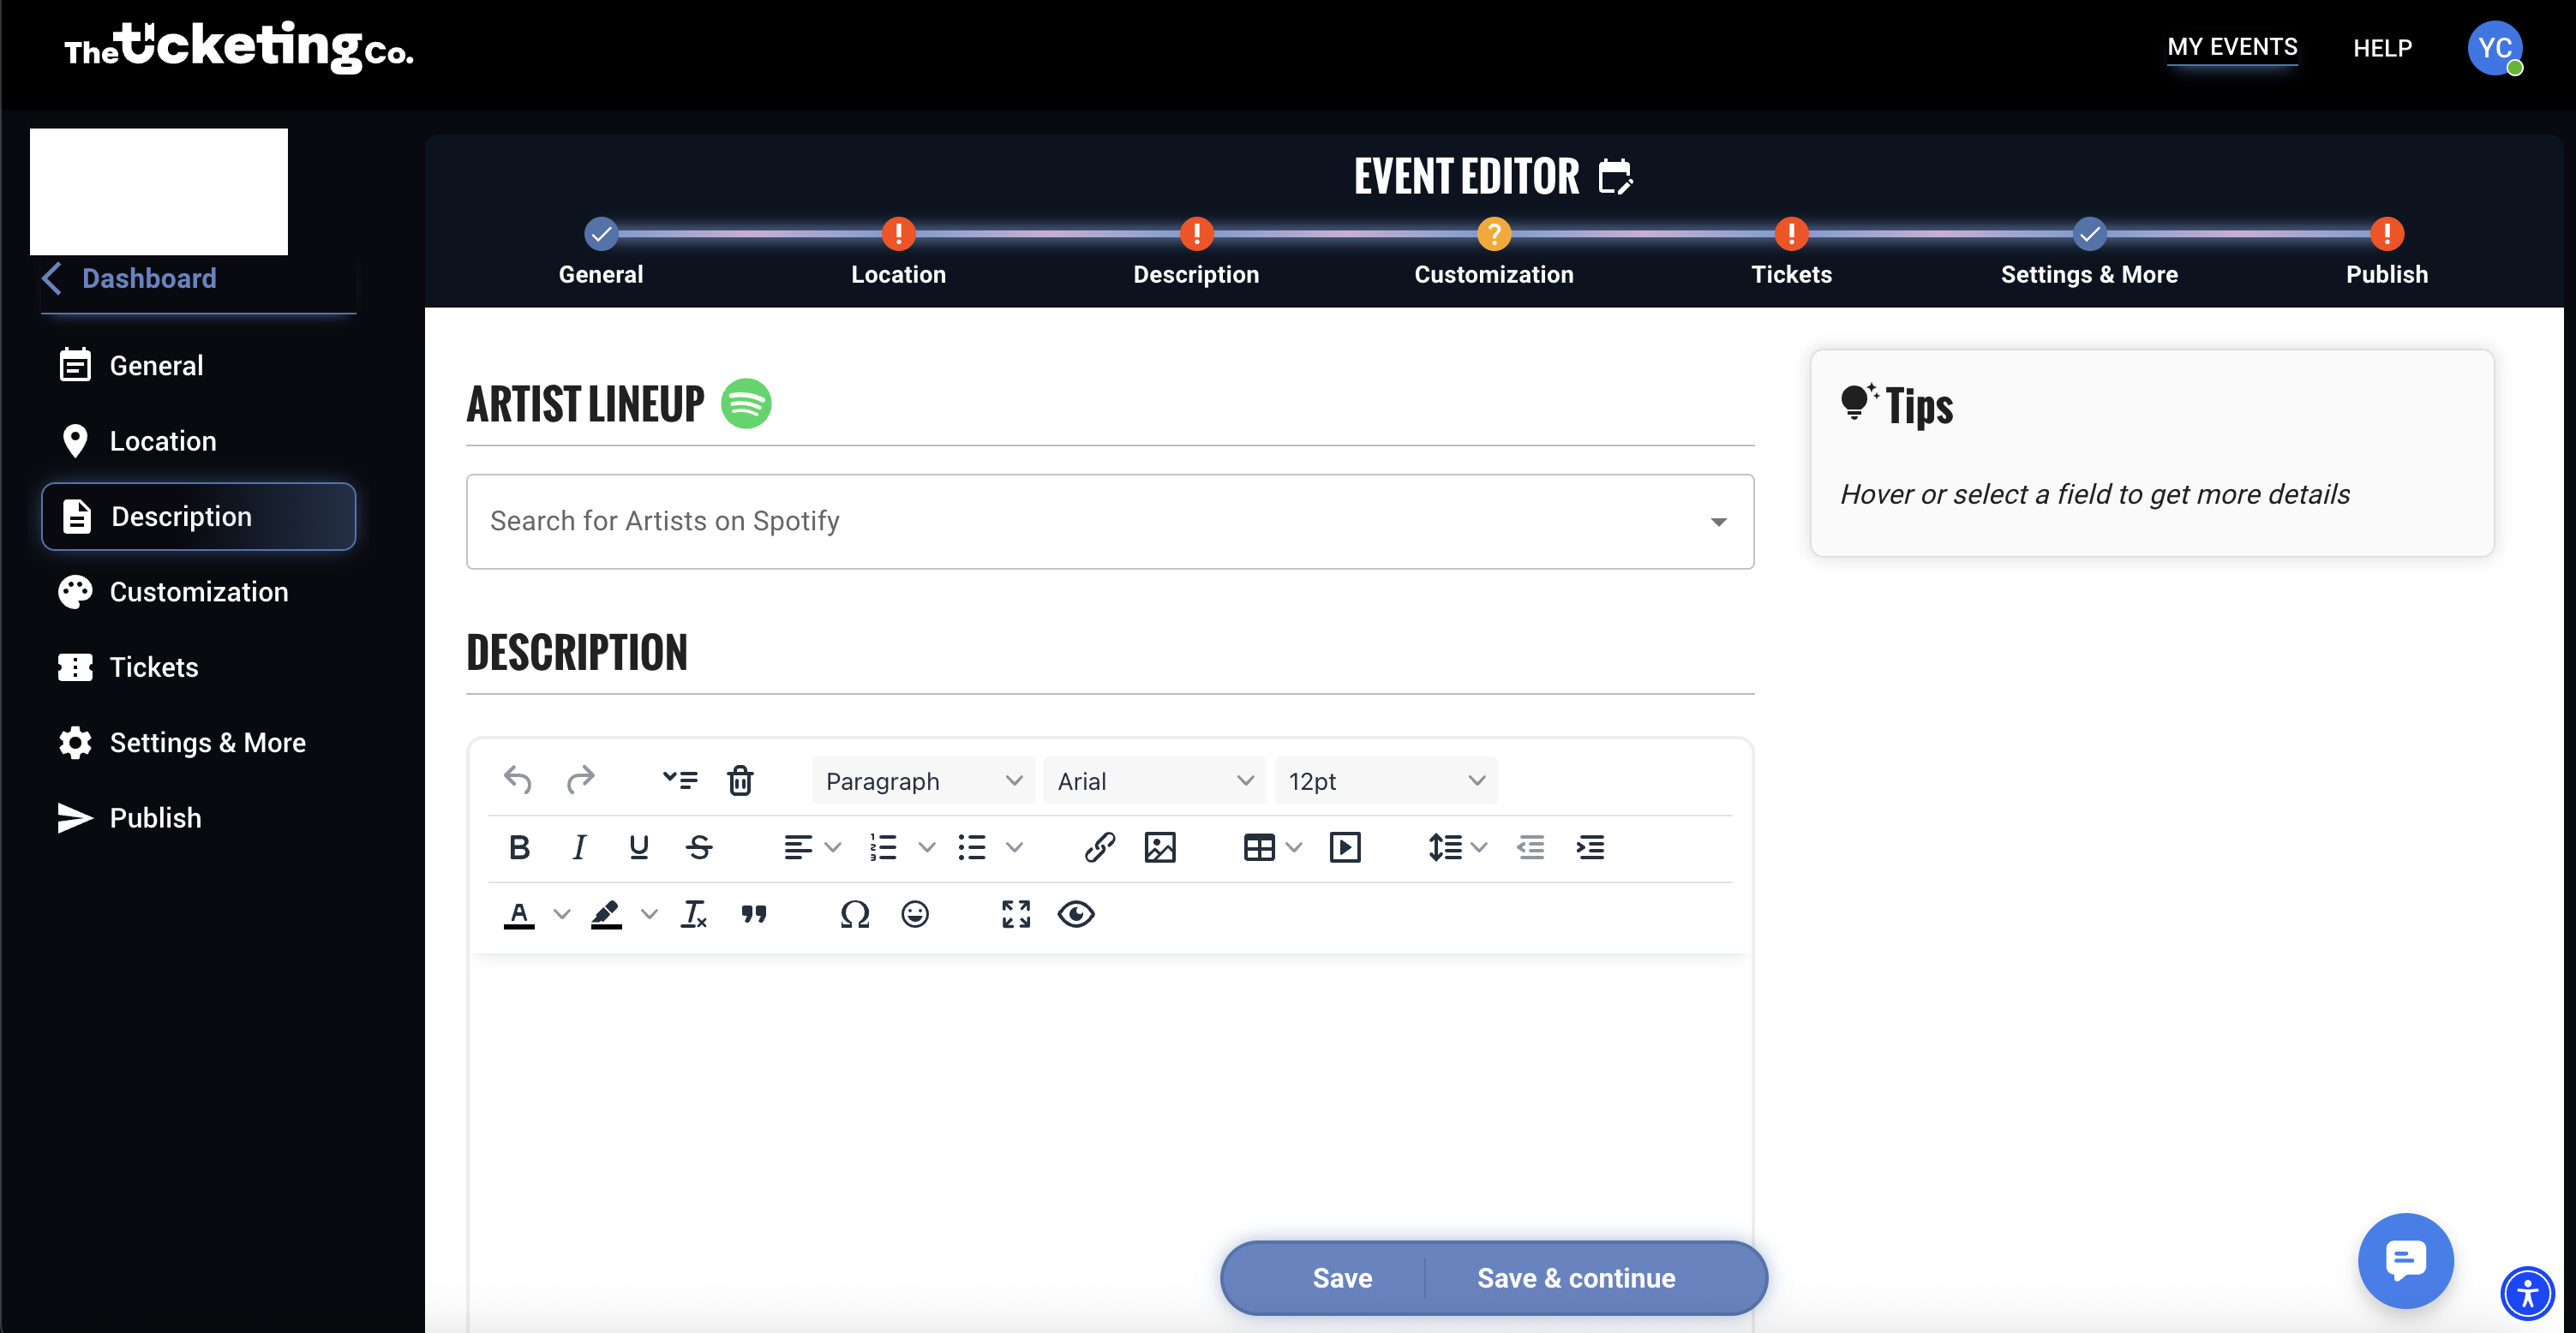
Once you "Save & continue", it's time to add your description to your event. You can add your artist lineup from Spotify and anything you want to add about your event. This is a great place to highlight the most exciting part of it!
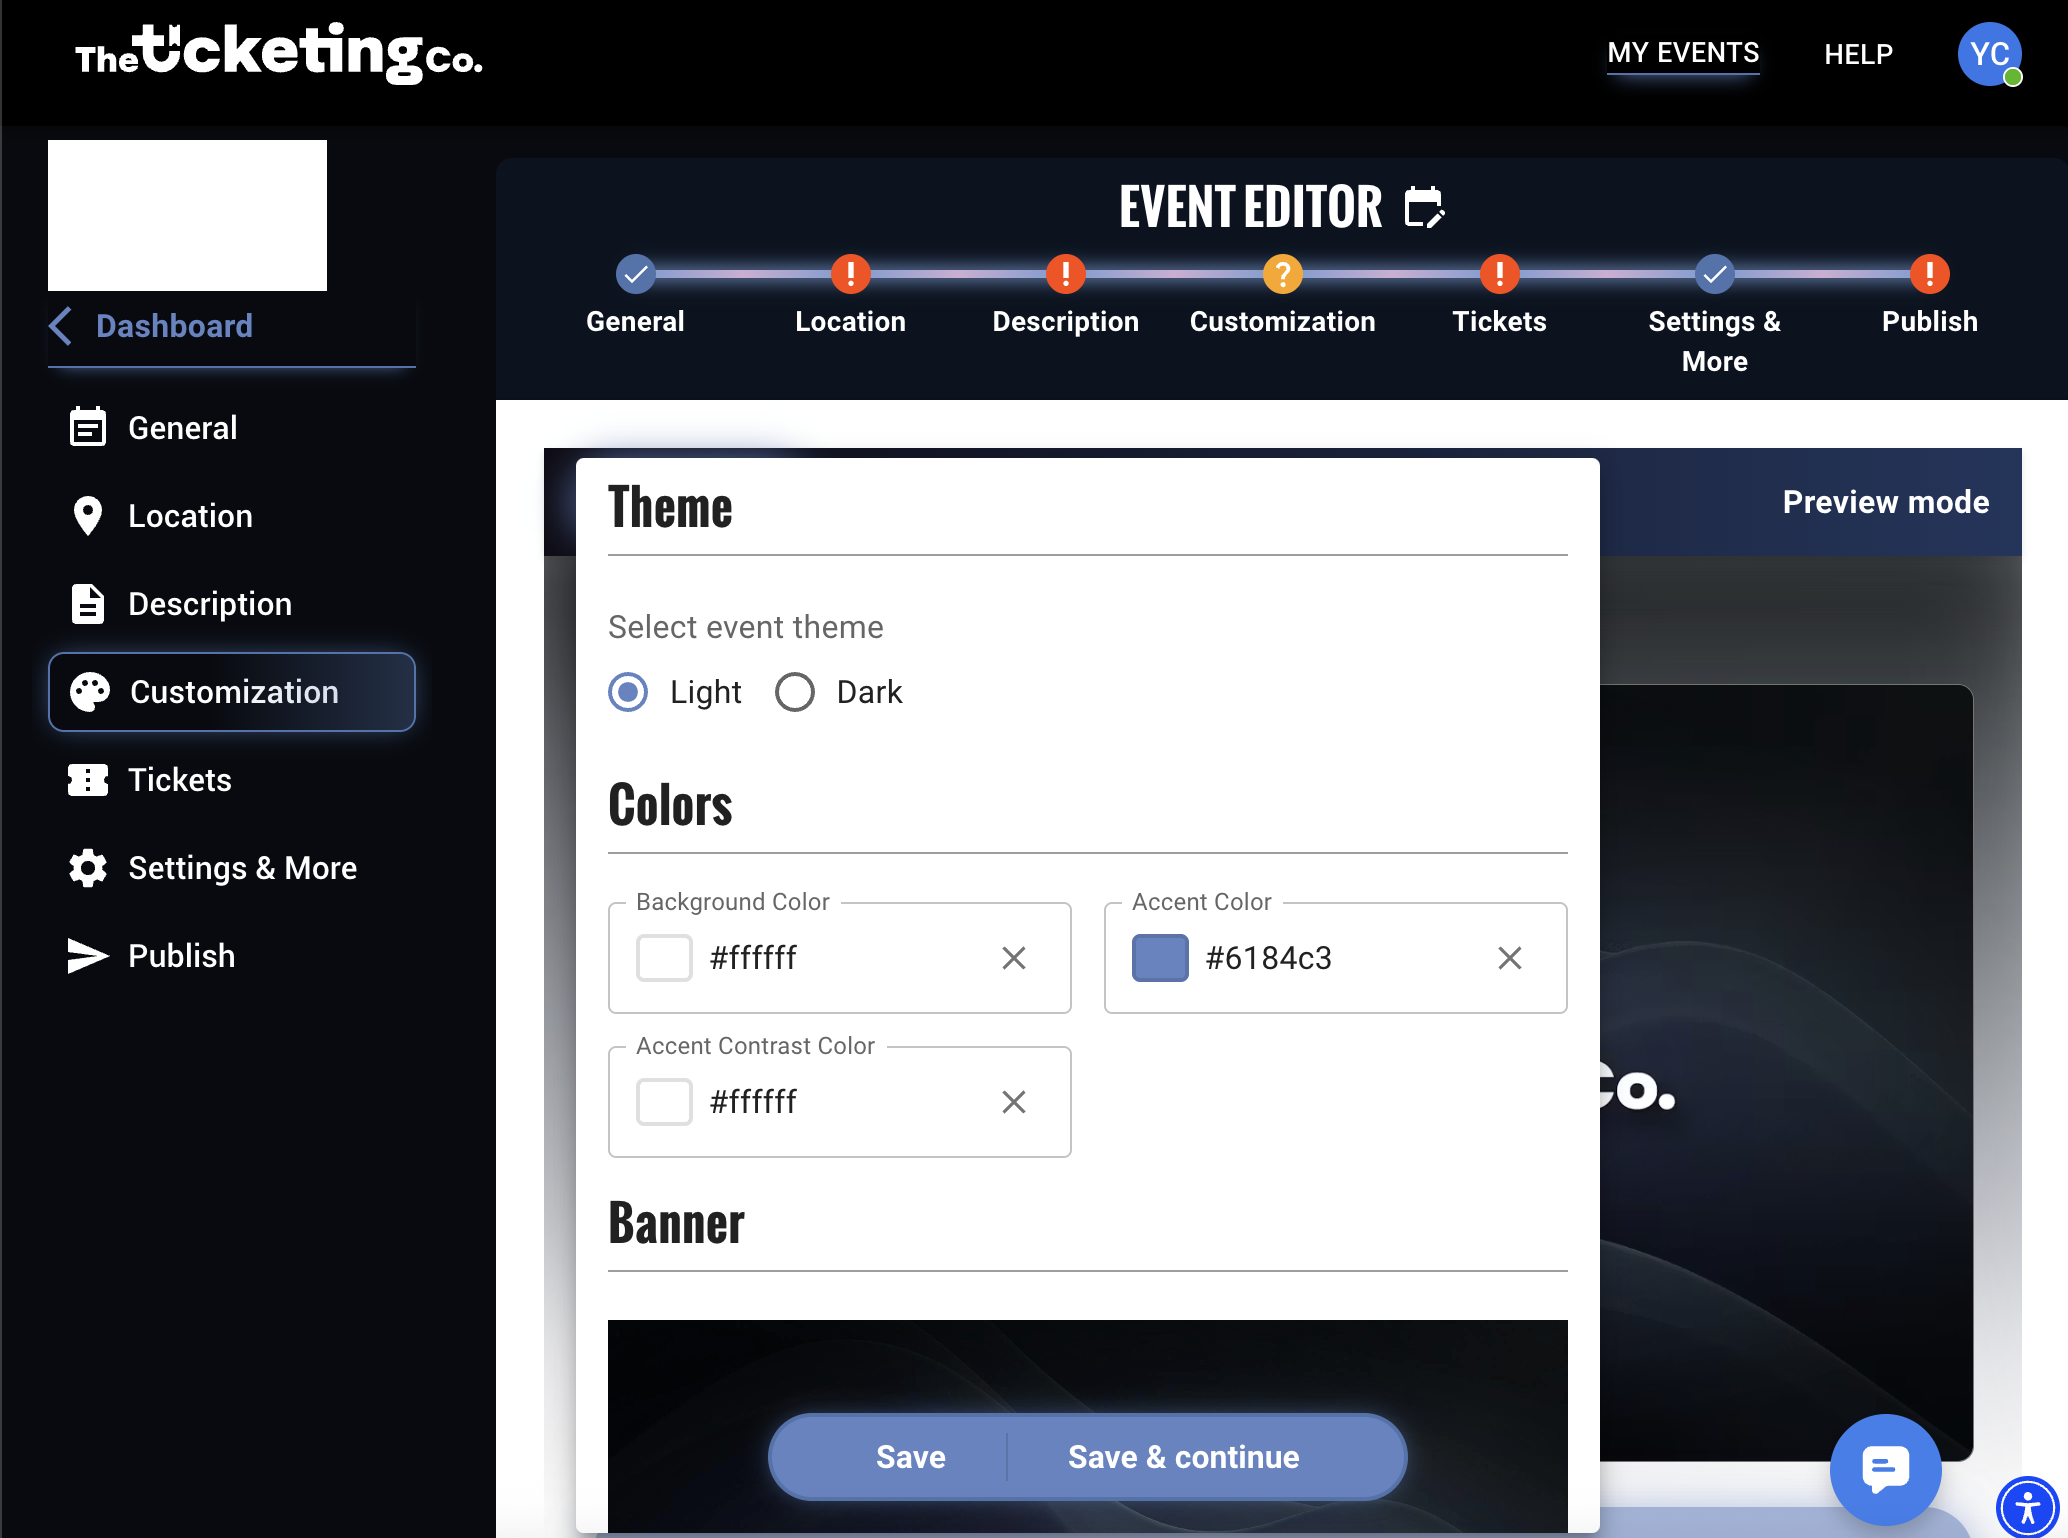
The next step is Customization for your event page! Upload your awesome banner, and it will be automatically resized to fit perfectly. Next, you can pick a theme and colors to fit your brand. It automatically bases off your banner so you don't HAVE to customize anything if you want it to be default!
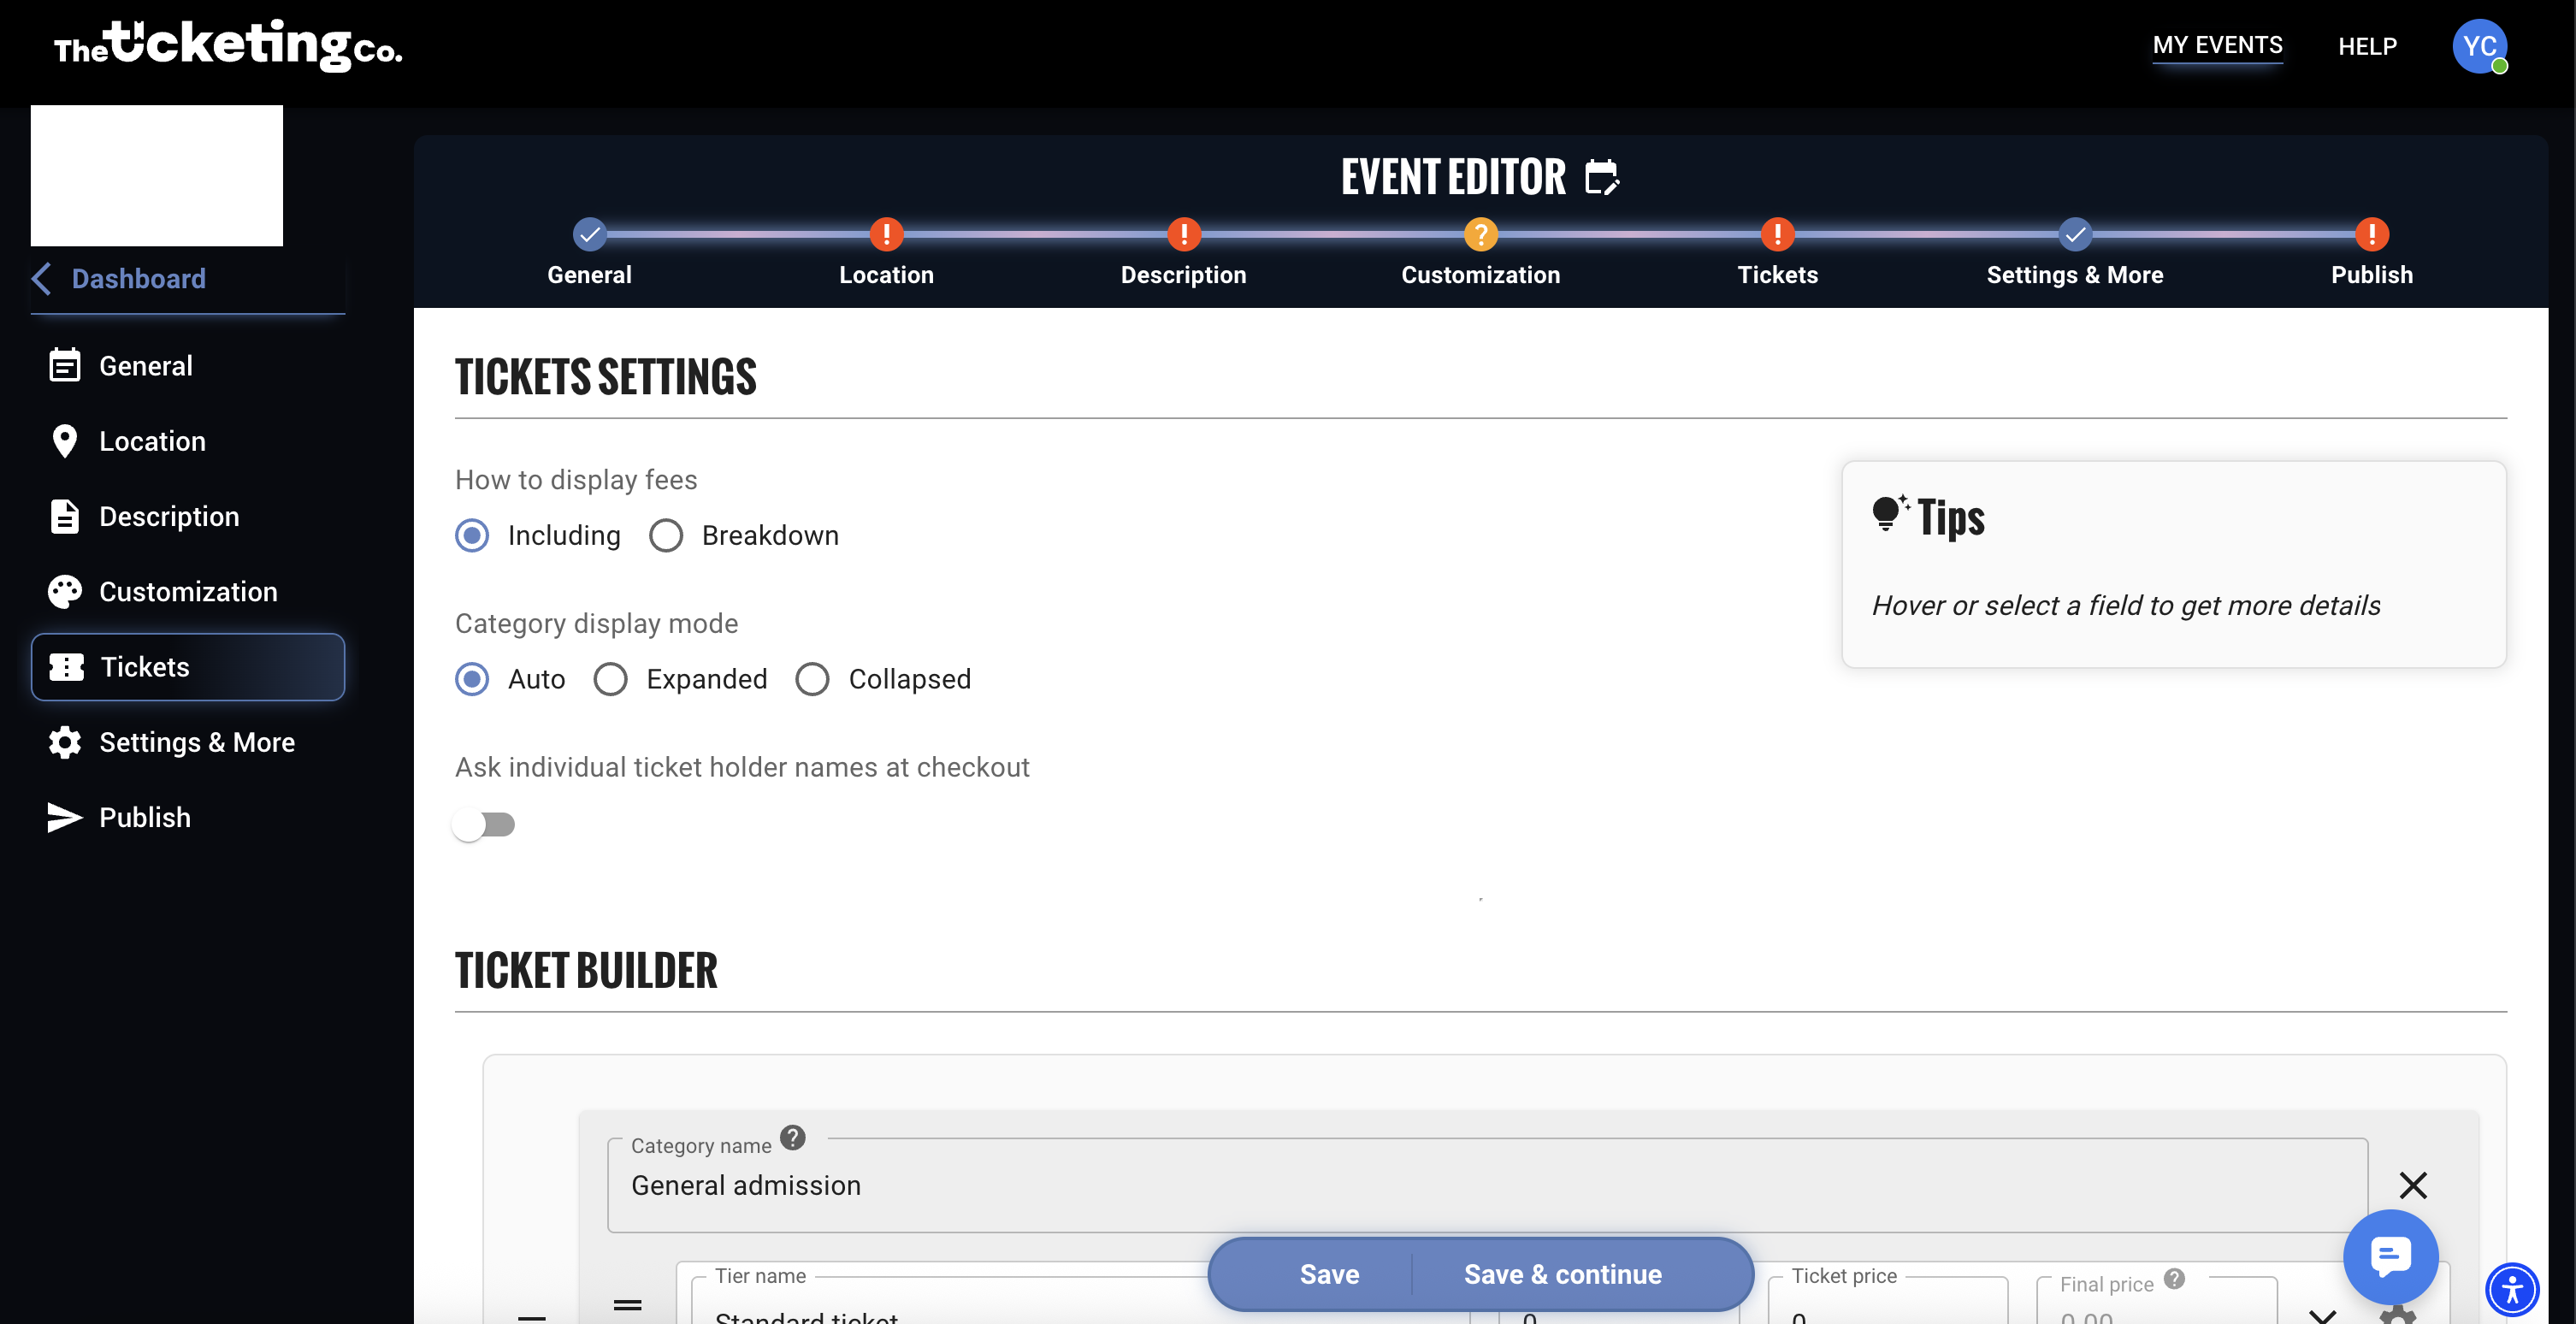
Press "Save & continue" to move on to creating your ticket tiers. Here, you can create the tickets you plan to sell to your customers. Set the name, quantity, and price of your ticket tier(s) at this step. You can also see the final price your customer pays for each tier!
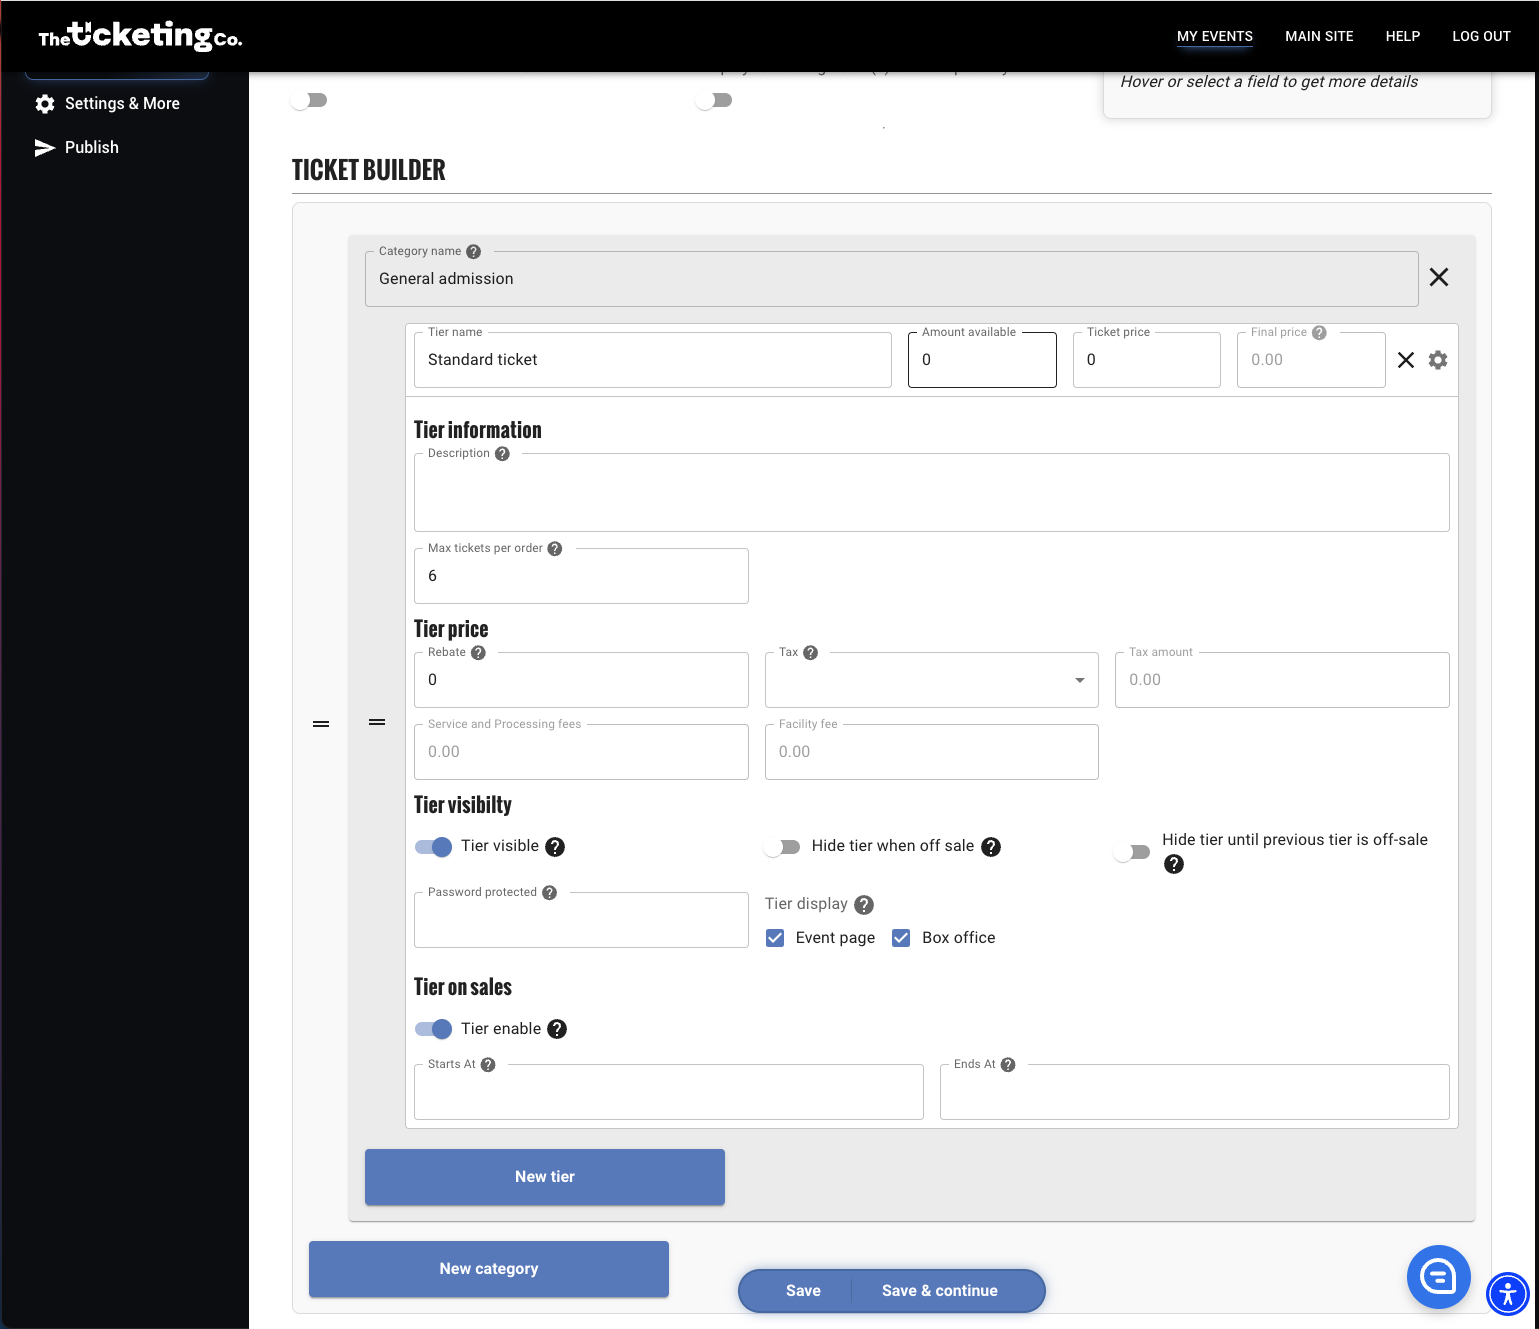
The ticket tier creation page is a visual drag-and-drop system that will display your ticket tiers on your event page in the order you set them here. Click and hold the two lines next to your tier name, and you can drop your tiers in the order you'd like to see them!
We allow you to group your tiers into categories as well so you can place similar tiers in the same area! (For example, creating a VIP category and adding VIP tickets to that category
For advanced options like setting descriptions, group tickets, visibility options, passwords, or rebates, click on the settings wheel on the right side of your tier, and it will reveal additional options. Not sure what something is? Hover over the "?" icon for the description!
Finally, choose your event settings and set up things like your event's URL, age requirements, event guidelines, whether your event is public or private (listed or unlisted), and if you want your event to launch at a specific date/time. Again, if you're unsure about one of the settings, hover over the "?" icon to get information about it!

Not done with setting up your event? Save it as a draft. Otherwise, create your event, and it will go live immediately! (Unless you set a future date/time for the launch date)
You can find your events in their various states in the "Events" drop-down menu on the top right by clicking on "My Events"